Setting Up a Scene
Scene Settings and Project Default Settings
When you start working on a scene, automatically it will belong to the current project, inheriting its settings and default folders. In this way all the scenes belonging to a project are created with the same settings, assuring the consistency of the production (see Managing Projects ).
Settings concern different tasks you may perform in Tahoma2D, such as the scanning, or cleanup process, the camera size and resolution, the frame rate, the output options, etc. They can be accessed in dialogs you can open with commands available in the related menu; for example the scan and cleanup settings commands are available in the Scan & Cleanup menu.
Settings for a particular scene can always be changed independently from the other ones, and will be automatically saved when the scene is saved.
If you want to change the default values you can save current scene settings as default, so that all new scenes created for that project will have those values.
Tip
To save current scene settings as project default settings:
Select File → Save Default Settings: all the settings from the current scene will become the project default.
Setting the Frame Rate
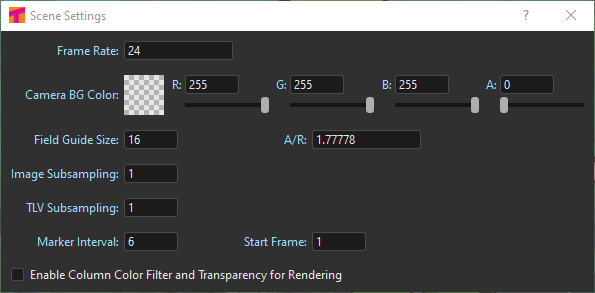
The frame rate is the number of frames per second of animation, and has to be set according to the type of output you have to render, for instance it should usually be 24 for cinematic production, 25 for PAL output, or 30 for NTSC.
The current scene frame rate can be set in the Scene Settings… dialog, and it is displayed in the bottom bar of any Viewer pane. In case the play back is activated, the actual frame rate is displayed on its left.
Apart from affecting the playback speed when previewing or rendering a scene, the frame rate also determines the frame count of an audio file when it is imported into the Xsheet (see Creating a Soundtrack ).
Even if a scene has been composited with a specific frame rate for a certain output, it is possible to render it out at a different frame rate by using the Stretch from FPS: To: option in the Output Settings → Other Settings dialog (see Choosing the Output Settings ).

Tip
To set the frame rate:
Choose Scene → Scene Settings…
In the Frame Rate text field set the frame rate value.
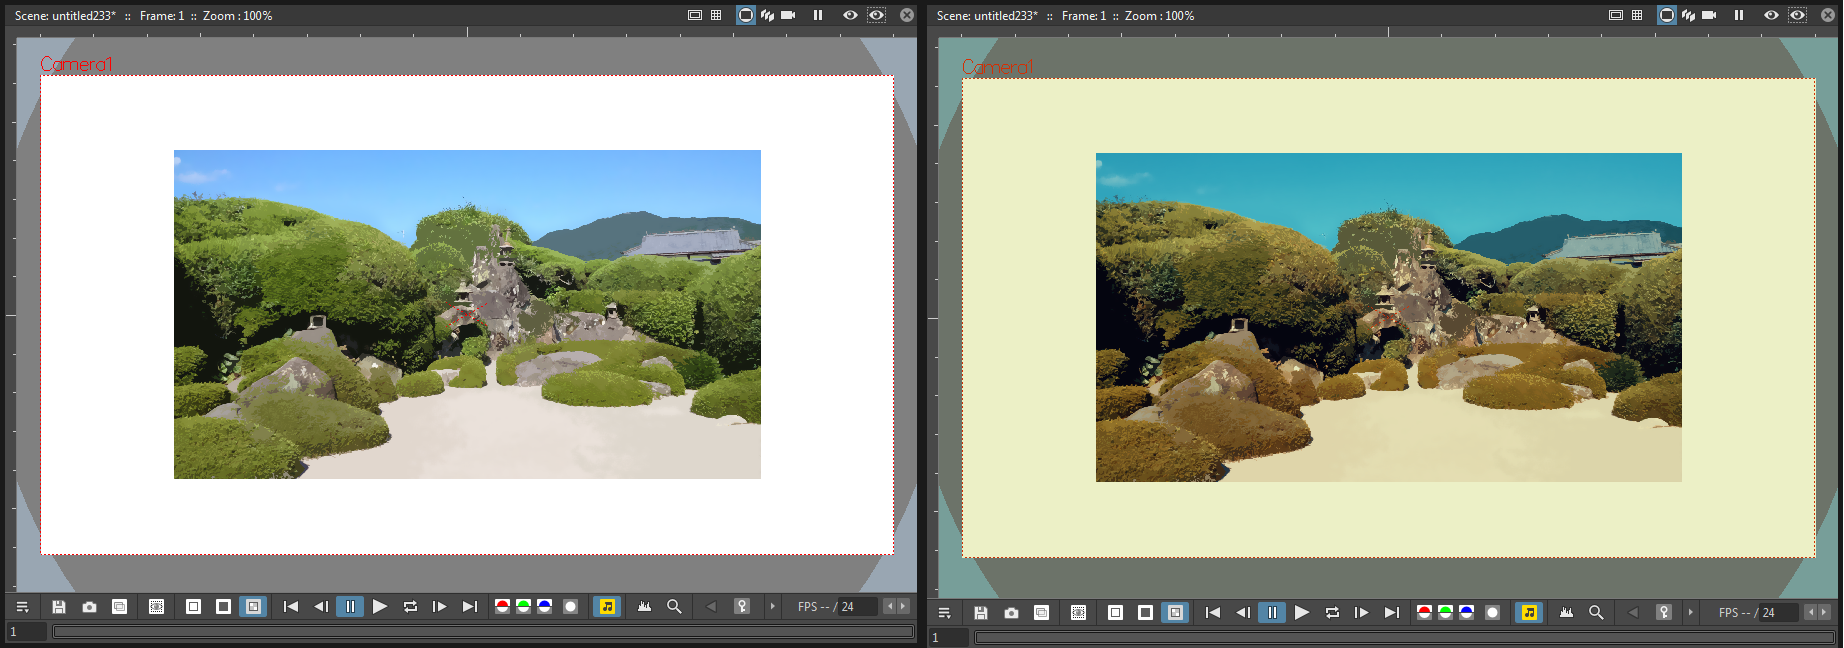
Defining Camera Settings
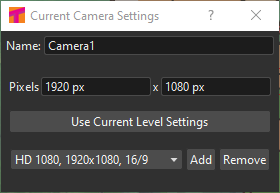
The Current Camera Settings dialog, that can be opened from the Scene menu, contains parameters for defining the current camera frame size and resolution.
More than one camera can be defined for each scene, in order to have different output resolutions, or to shot only a particular area of the scene (see Using the Stage Schematic ).
The camera frame size can be expressed in any unit, but will be visualized in the default one chosen in the Preferences → Interface dialog.
In Tahoma2D the Camera is defined by different parameters:
X (Width) and Y (Height) frame size of the camera, expressed in the default Camera Unit (usually inches).
A/R is the aspect ratio value resulting by dividing Width/Height.
X and Y resolution Pixels of the resulting image frame seen by the camera.
X and Y DPI values, calculated using the standard formulas: XDpi=XPx/Width, and YDpi=YPx/Height. This two fields can be forced to have the same value, by activating the equal-sign button between them.
When inserting a value in one field, the others change accordingly as needed for having a consistent camera. You can decide which set of values has to be considered fixed by Tahoma2D. The lock-shaped buttons and the radio buttons at the leftmost column of the camera parameters, let you select which column and row of values has to be preserved by Tahoma2D, while changing the others as needed.
The Use Current Level Settings button let you set the camera for framing exactly the content of the selected level. Just press this button and Tahoma2D will calculate the appropriate values for the camera.
Camera resolutions can also be selected from a list of predefined camera settings. You can add any camera preset you define to the list, as well as remove any predefined camera from it.
Note
The predefined cameras list is saved in the file reslist.txt stored in the projectroot.
Tip
To add a preset camera resolution:
Set the resolution and A/R for the camera you want to save.
Click the Add button on the right of the preset cameras list.
Assign a name to the camera resolution and click the OK button.
Tip
To remove a preset camera resolution:
Select the camera resolution you want to remove in the preset cameras list.
Click the Remove button on the right of the preset cameras list.
Color Calibration using Look-up Tables
Tahoma2D can manage the previsualization of color through the use of 3D Look-up Tables. By applying a 3D LUT file, properly configured for the current display monitor, it will be possible to work on different color spaces, such as Rec. 709, DCI-P3 or Rec. 2020.
Once a 3DLUT is active, all colors displayed on Viewer, Combo Viewer, Flipbook, Color Model, Palette, and Style Editor will be corrected.
Note
Currently, only the .3dl file format is supported. It must follow specification written here.
Note
Currently, only the Windows version of Tahoma2D can detect the currently connected monitor. For other platforms only one 3D LUT file can be applied for any type of monitors. (Even on Windows, connecting multiple different monitors at the same time is not supported for now. It will only identify the first registered monitor).
Note
PLEASE NOTE: At the moment, using Plastic deformation together with this feature causes a display issue such that the deformed image is not shown in Camera Stand mode of the Viewer.
Tip
To apply a 3DLUT file for previsualizing color:
Choose File → Preferences… → Interface.
Activate the Color Calibration using 3D Look-up Table option.
In the 3DLUT File for [monitor]: option, press the file browser button to navigate and select the desired .3DL file.
Restart Tahoma2D for the changes to take effect.
Assigning Memory for the Undo Operations
All the operations performed in the software can be undone by using the Edit → Undo command, even to go back for several steps.
Undo operations require computer memory in order to be performed, and some of them may require more memory than some others, according to their complexity.
To prevent most of the computer memory to be used by undo operations while you work, a situation that slows down the software performance, it is possible to set a limit for it by specifying the Undo Memory Size (MB) in the Files → Preferences → General dialog.
As soon as the limit is reached, the oldest undo operations will be discarded to make room for the new ones.
Optimizing the Memory Usage
When working with Raster images, predominantly being animation levels scanned with Tahoma2D or GTS, an extensive usage of computer memory may be required during the cleanup, painting and rendering processes.
After a certain amount of time the computer performance may worsen, as the memory gets fragmented because of the several writing and reading accesses. To prevent this behavior, the Minimize Raster Memory Fragmentation* option can be activated in the Files → Preferences → General dialog. When activated, a section of computer memory is reserved and used only for operations concerning Raster images.
If you are working mainly with vector images, that have been drawn inside Tahoma2D, this option should be deactivated, as the reserved memory section would be otherwise unused by the computer.
Note
The change set for this option is valid only after Tahoma2D is restarted.