ToonzScript
ToonzScript is the scripting language used in Tahoma. Using ToonzScript allows users to create sequences of commands, thus avoiding the need to perform repetitive tasks manually. ToonzScript is based on QtScript and is built on the ECMAScript standard. A reference guide for the ECMAScript standard can be found at the following URL:
Note
Several well known scripting languages are based on the ECMAScript standard such as JavaScript, JScript, and ActionScript. The ToonzScript syntax is similar to that of JavaScript, for this reason, a good introduction to JavaScript can be very useful to better understand ToonzScript’s basics.
The original ToonzScript page with some (rather old) examples is available at the following URL:
Scripts can be run using the File → Run Script... command. Alternatively, commands can be typed and executed directly in the Script Console, which can be opened using the File → Open Script Console... command.
Note
When a script is running, the Script Console will open automatically to show the commands contained within the script.
File management
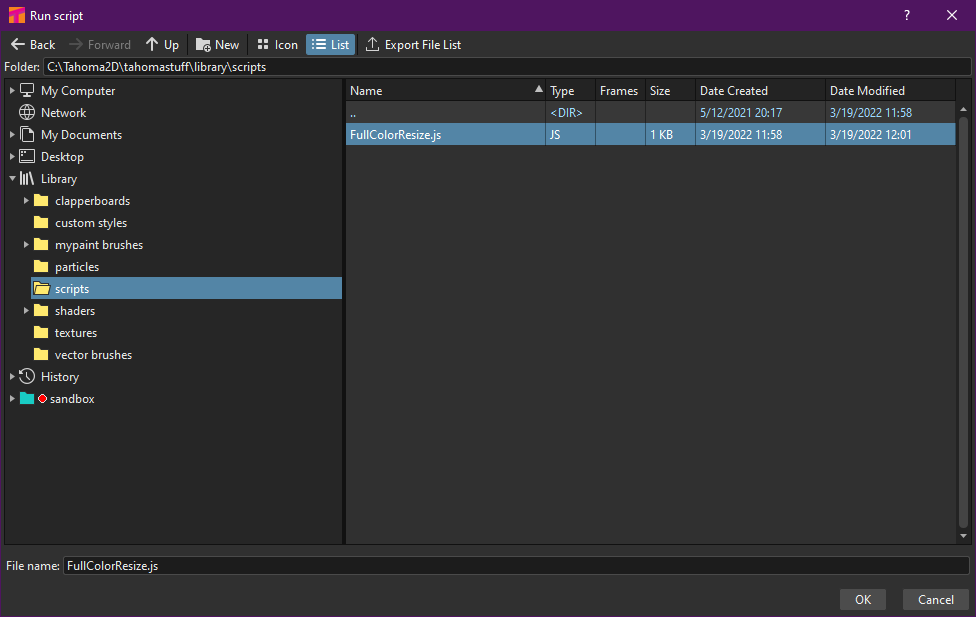
The ToonzScript file extension is .js, scripts need to be in the Tahoma stuff/library/script folder, to be automatically retrieved by opening the Run Script command browser.
Using the Script Console
The Script Console allows the user to directly enter commands, additionally, dragging & dropping external text files into the console will automatically insert the path of the file(s).
Start a series of lengthy operations from the console does not block the interface.
Console use conventions
The following conventions are implemented in the use of the Script Console:
Only the text of the last paragraph can be edited.
The Up and Down arrow keys allow the navigation of the command history.
The execution of time consuming commands doesn’t prevent interaction with the software interface.
The ctrl+y shortcut interrupts the execution of time consuming commands.
When entering a path in a string, any and all backslashes must be doubled. Following this rule the path:
C:\tmp\test.jpgbecomesC:\\tmp\\test.jpg.Even if working on a Windows family OS the slash and the backslash can be used in the same way, thus the path
C:\tmp\test.jpgis equivalent to the pathC:/tmp/test.jpg.The drag & drop of an external file into the console generates a string containing the file’s path and the backslashes are doubled automatically.
While you can copy multiple lines of text from the console is allowed only one line paste.
ToonzScript specifications
Built on the foundaments of ECMAScript, ToonzScript retains a degree of similarity to the JavaScript syntax but, at the same time, implements some functions and several classes specifically built to make easier the interaction with the Tahoma software architecture. Here follows the list of the ToonzScript specifications:
Commands
- print(arg1, arg2, …): writes a message on console.The print command doesn’t return the
undefinedvalue.
Example:
print(“result=”,12*3);
- run(filename): runs the script saved in filename.The relative path are referred to the folder “<tahoma library>/scripts/”
Examples:
run(“test.js”)
run(“C:\\Users\\Username\\Tests\\another_test.js”)
- view(image): allows to view an image.The view command can be legally used in the following context:
view(new Image(filename)) - view(level): allows to view a level.
Example:
view(new Level(“C:\\Tahoma stuff\\sandbox\\drawings\\A.pli”))
The variable
ToonzVersioncan be used to check the current version of Tahoma.
Classes
For each class, the related constructor, methods and attibutes are listed.
File path
contains the path of an object.
Constructor:
new FilePath(path)
Methods:
path2 = path.withExtension(e)
path2 = path.withName(name)
path2 = path.withParentDirectory(d)
path2 = path.concat(f) - where f can be a FilePath or a string
files = path.files() - if path is a folder then this method returns the files inside the folder.
Attributes:
path.extension - read and write attribute
path.name - read and write attribute
path.parentDirectory - read and write attribute
path.lastModified - read only attribute
path.exists - read only attribute
path.isDirectory - read only attribute
Examples:
myRoot = new FilePath(“C:\\Users\\username\\”);

f = myRoot.concat(“tests”).concat(“name.0001.tif”);

print(f.extension); // => “tif”

print(f.name); // => “name”

print(f.parentDirectory); // => “C:\Users\username\tests”

if(f.exists) print(“the file “,f,”exists”); else print(“the file “,f,”does not exist”);

d = new Date().getTime() - f.lastModified.getTime();

d.setDate(d.getDate()-1);

if(f.lastModified>=d) print(“file modified in the last 24 hours);

files = myRoot.files();

for(k in files) print(files[k]); // print all files in myRoot
Image
contains an image, supported types are: tlv, pli or fullcolor.
Constructor:
new Image() or new Image(filename)
Methods:
img.save(filename) - the file extension has to be compatible with the kind of used level
img.load(filename)
Attributes:
img.width - has value 0 if the image is a pli
img.height - has value 0 if the image is a pli
img.dpi - has value 0 if the image is a pli
img.type - accepted values (“Empty”, “Raster”, “ToonzRaster”, “Vector”)
Examples:
img = new Image(“C:/images/basename.0003.tif”);

view(img);

print(img.width,img.height,img.dpi);

img = new Image(“C:/images/name.pli”); // reads only the first frame.

view(img);

img.save(“C:/images/name.pli”);
Level
contains a level, the supported types are: tlv, pli or fullcolor.
Constructor:
new Level() or new Level(filename)
Methods:
level.load(filename)
level.save(filename) - the file extension has to be compatible with the kind of usedlevel
level.getFrameIds() - lists the names of all the frames
level.getFrame(frameId) - retrive the image of the specified frame
level.getFrameByIndex(index) - gets the frame specified by the index value (first value of index is 0)
level.setFrame(frameId, image) - sets a frame (if the level is not empty its content and the type of image has to be compatible)
Attributes:
level.name - is a read and write attribute
level.path - is a read and write attribute
level.frameCount - is a read only value
level.type (“Empty”, ”Raster”, ”ToonzRaster”, ”Vector”) - is a read only value
Examples:
// This example produces a "renumber"

inputLevel= new Image(“C:/images/name.pli”);

outputLevel = new Level();

for(i=0;i<inputLevel.frameCount;i++)
{
    outputLevel.setFrame(i+1, inputLevel.getFrameByIndex(i));

    outputLevel.save(“C:/images/name.pli”);
}

// instead this keeps the sequence of frames, but reverses the order

outputLevel = new Level();

fids = inputLevel.getFrameIds();

for(i=0;i<fids.length;i++)
{
    img = inputLevel.getFrame(fids[fids.length-1-i]);
    outputLevel.setFrame(fids[i], img);
}

view(outputLevel);
Scene
contains a Toonz scene.
Constructor:
new Scene() or new Scene(filename)
Methods:
scene.load(filename)
Note
If the path is relative, scenes of the current project are used.
scene.save(filename)
scene.setCel(row, col, cell) , scene.setCell(row, col, level, frameId)
Note
cell is the kind of object returned by getCell() .
The following syntax is allowed
scene.setCell(1, 0, scene.getCell(0,0))To delete a cell:
scene.setCell(row, col, undefined)cellis a standard JavaScript object that includes the attributes:levelandfid, the following use is allowed:scene.setCell(row, col, {level:a, fid:1})levelcan be a Level or a level name. The level has to be already in the scene.fidsupports numeric values or string values as “2” or “2a”.
cell = scene.getCell(row, col) - returns a JavaScript object with level and fid attributes
scene.insertColumn(col)
scene.deleteColumn(col)
scene.getLevels() - returns an arrray that contains all the levels belonging to the scene
scene.getLevel(name) - returns the level basing on its name. If a level using the name specified does not exists the value
undefinedis returned.level = scene.newLevel(type, name) - Adds a layer to the scene. Type can be “Raster”, “ToonzRaster” or “Vector”. Name must not be already ‘used in the scene.
level = scene.loadLevel(name, path) - Load a level (mode ‘“links”) in the scene. The path must exist and be an absolute path.The name must not have been already used for another level of the scene.
Attributes:
scene.frameCount - is a read only value
scene.columnCount - is a read only value
Examples:
filename = “test.tnz”; // relative to “+scenes”

scene = new Scene(filename);

print(scene.frameCount, scene.columnCount);

// Move the cells of the first column on the first frame of the other columns.

for(r=1;r<scene.frameCount;r++)
{
    scene.setCell(0,r, scene.getCell(r,0));

    scene.setCell(r,0,undefined); // delete the old cell.
}

scene.save(“name.tnz”);

//Create a new scene.

scene = new Scene();

level = scene.load(“A”,”C:/levels/name.pli”);

fids = level.getFrameIds();

for(i=0;i<fids.length;i++) scene.setCell(i,0,level,fids[i]);

scene.save(“name.tnz”);

// writes name, path and number of frames of each level in the scene.

scene = new Scene(“name.tnz”);

levels = scene.getLevels();

for(i=0;i<levels.length;i++)
{
    level = levels[i];

    print(level.name, level.path, level.frameCount);
}
Transform
represents a geometric tansformation (composed by rotation, translation and scale). Used by ImageBuilder.
Constructor:
new Transform()
Methods:
transform.translate(dx, dy)
transform.rotate(degrees)
Note
Positive values correspond to a counterclockwise rotation.
transform.scale(s)
transform.scale(sx, sy)
Examples:
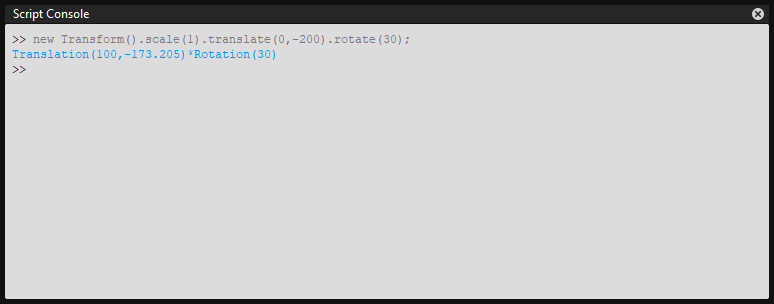
transform = new Transform().rotate(45).translate(10,2);

print(transform);
ImageBuilder
allows to modify an image (rotate, scale, crop), or to make an over between two or more images.
Constructor:
new ImageBuilder() or new ImageBuilder(xres, yres)
Methods:
builder.add(img)
builder.add(img, transform)
Note
The component of translation of the transform means expressed in pixels for Raster and Smart Raster levels, and in Camera Stand units for Vector levels.
builder.fill(color)
Attributes:
builder.image - returns the actual result.
Examples:
ib = new ImageBuilder(800,800);

img = new Image(“C:/levels/name.0001.tif”);

scale = 1;

phi = 0;

for(i=0;i<20;i++)
{
    tr = new Transform().scale(scale).translate(0,-200).rotate(phi);

    ib.add(img, tr);

    phi -= scale*30;

    scale *= 0.9;
}

view(ib.image);
OutlineVectorizer
vectorize raster images using an outline algorithm.
Constructor:
new OutlineVectorizer()
Methods:
v.vectorize(level or image) - returns the new vectorized level (or image), supports as input: Raster or Smart Raster images and levels.
Attributes:
v.accuracy
v.despeckling
v.preservePaintedAreas
v.cornerAdherence
v.cornerAngle
v.cornerCurveRadius
v.maxColors
v.transparentColor
v.toneThreshold
Examples:
v = new OutlineVectorizer();

v.preservePaintedAreas = true;

a = new Image("C:/Users/username/name.tif");

b = v.vectorize(a);

view(b);
CenterlineVectorizer
vectorize raster images using a centerline algorithm.
Constructor:
new CenterlineVectorizer()
Methods:
v.vectorize(level or image) - returns the new vectorized level (or image), supports as input: Raster or Smart Raster images and levels.
Attributes:
v.threshold
v.accuracy
v.despeckling
v.maxThickness
v.thicknessCalibration
v.preservePaintedAreas
v.addBorder
Examples:
v = new OutlineVectorizer();

v.preservePaintedAreas = true;

a = new Image("C:/Users/username/name.tif");

b = v.vectorize(a);

view(b);
Rasterizer
converts vector images into Raster or ToonzRaster images.
Constructor:
new Rasterizer()
Methods:
out = r.rasterize(vimg) - converts to raster an image or a level
Attributes:
r.colorMapped - if its value is set to True the generated image is of ToonzRaster type
r.xres
r.yres
r.dpi
Examples:
a = new Level("C:\\Users\\username\\PLI\\name.pli");

r= new Rasterizer();

r.xres=768; r.yres=576; r.dpi=40;

b = r.rasterize(a);

b.save(“C:\\Users\\username\\PLI\\name.tif”);

r.colorMapped = true

c = r.rasterize(new Level("C:\\Users\\username\\PLI\\name.pli"))

c.save(“C:\\Users\\username\\PLI\\bimba.tlv”);
Renderer
renders a whole scene or part of a scene, creating levels or images.
Constructor:
new Renderer()
Methods:
level = c.renderScene(scene)
image = c.renderFrame(scene, frameIndex)
Note
frameIndex starts from 0
Attributes:
r.columns (list of indices of columns to render. e.g. r.columns = [0,3])
r.frames (list of indices of frames to render. e.g. r.frames = [0,1,2,3])
Examples:
scene = new Scene("testscene.tnz”);

r= new Rasterizer();

view(r.renderScene(scene ,0));

r.columns = [0,2];

view(r.renderScene(a,0)); // frame 1; columns 1 and 3

r.frames = [0,2,4,6];

output = r.renderScene(scene ); // frames 1,3,5,7; columns 1 and 3

output.save(“C:\\Users\\username\\output\\name..tif”);

r.columns = [];

output = r.renderScene(scene ); // frames 1,3,5,7; all columns

output.save(““C:\\Users\\username\\output\\name..tif””);
Code examples
Following there are some examples of scripting code:
Outline vectorization
This brief script is an example of using the OutlineVectorizer on a single image. The script is commented, explaining what each section does:
//Define the input and output folders

dir = "C:\\Tahoma stuff\\SCRIPT IMAGES IN\\";

dir2 = "C:\\Tahoma stuff\\SCRIPT IMAGES OUT\\";


//Load image toad3.0001.tif from disk

a = new Image(dir+"toad3.0001.tif");

print("loaded",a);


//Initialize a vectorizer and specify any relevant options

v = new OutlineVectorizer();

v.maxThickness = 1;

v.preservePaintedAreas = false;

v.accuracy = 10;

v.maxColors = 10;


//Run the vectorization process and save the result

v.vectorize(a).save(dir2 + "vec.pli");

print("vectorized");
Rotating an image
This example explains how to load an image and then create an animation in a level, rotating the loaded frame:
\\Define the input and output folders

dir = "C:\\Tahoma stuff\\SCRIPT IMAGES IN\\";

dir2 = "C:\\Tahoma stuff\\SCRIPT IMAGES OUT\\";


//Load the toad3.tif image

a = new Level(dir+"toad3..tif");

print("loaded\n",a);


//Initialization of the new objects and creation of a list containing the IDs of all the frames

t = new Transform();

b=new Level();

ll=a.getFrameIds();


//For loop that builds the new level. At each step a new frame is added to the level b using the
setFrame method that adds the myimage frame rotated of a step degrees value using the ib ImageBuilder

for(i=0; i<a.frameCount;i++)
{
    ib = new ImageBuilder();

    step=360/a.frameCount;

    myimage=a.getFrame(ll[i]);

    b.setFrame(ll[i], ib.add(myimage, t.rotate(step)).image);

    print("building frame " + ll[i] + "\n");
}


//Save the result prompting a status message

b.save(dir2+"rottoad3..tif")

print("saved\n",b);


//Shows the resulting level in a flipbook panel

view(b);